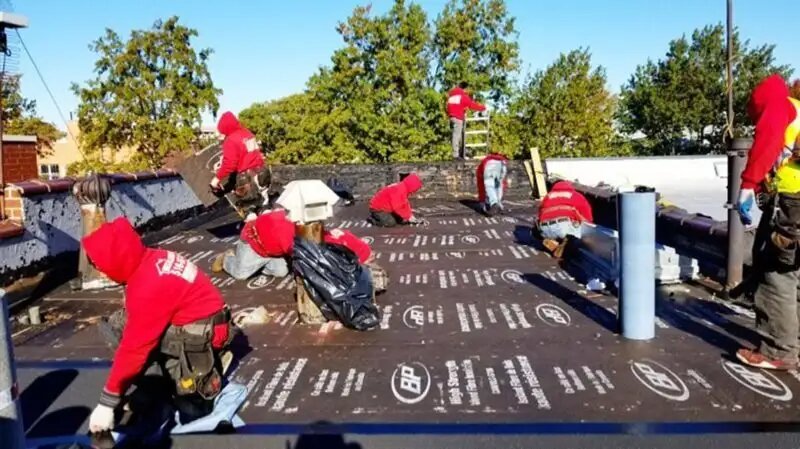
Are you required to give your structure a brand-new look? Think about installing a flat roof. This style of the roof looks satiny and ultramodern, and, if installed to bear weight, could make for a lovely out-of-door living space. Flat roofs can be tricky, still, as they’re more inclined to leaks and cracks you’ll want to be sure you install it duly by contacting a professional roofer to handle the installation for you. Here are the steps if you decided to go DIY.
Step One
Take off the plies of the flat roof by shoving into them with a spade. Plies are the coatings of felts, fabrics, and mats that make up roofs. Constantly stand on a strong section of the roof and wear long pants, long sleeves, and safety spectacles. Orient the spade at a 30 to 40-degree angle to the roof and start pushing a spot in the middle of the roof continually.
Step Two
Pull off the mortar-filled border framework that’s flush with the wall. In numerous cases, you can take off these pieces with a strong haul. Snag the left and right side of each piece with both hands and begin wriggling it to the left and right while pulling backward. However, place your spade underneath each piece at a 45-degree angle and switch it up and down, if this does not do. Once it’s loose, tug it out with our hands.
Step Three
Lever the felt flush to the border that isn’t against any wall. Remove the felt at the border. Set up your spade underneath it and apply pressure overhead. take off the edges of the roof using by fitting your spade between the felt and the roof. subsequently, move the spade in a mincing motion to remove the felt.
Step Four
Measure your roof and elect an appropriately-sized EPDM membrane. Use a measuring tape recording to measure the length and range of your flat roof. Utmost standard EPDM membranes are 1.2 millimeters. However, handpick marketable membrane thickness, which is generally 1, If you want something bigger or further durable.
Step Five
Open the EPDM square vertically along the breadth of the roof. Lay down the square folded EPDM stuff in the center of your flat roof. skim the upmost piece of the EPDM material over across the length of the roof. Align the bottom so its similar to the bottom length of the roof. subsequently, flip the next uppermost piece upward. Align it so it’s corresponding to the top edge of the roof.
Step Six
Spread the perpendicular EPDM membrane horizontally along the range of the roof. snare the top rectangle by its left-most intersections and flip it to the right across the roof to align with the right-most edge. Subsequently, drag the remaining part of the EPDM membrane to the left until it meets the left range of the roof. Let the EPDM membrane swing off the edge of your roof by 3 inches.
Step Seven
Tow the EPDM membrane back from the left and fold it to the right edge of the roof. Check that there are now 2 layers of the EPDM piece coursing the right half of your roof. Align the perpendicular edge of the crease with the base of your roof. Use measuring tape to ensure that the crease of your EPDM membrane is aligned with the center of the roof.
Step Eight
Apply water-grounded adhesive horizontally from the EPDM crease. Use a sticky roller to apply the glue in 2-to-3-foot vertical swipes out from the crinkle of the EPDM material. Make sure the glue doesn’t puddle in any areas. Apply glue until the layers are dark and you cannot see the roof underneath. Keep up moving outward until you have filled in the left half of the roof with glue. Make certain that there are no spots where you can see the roof. Use perpendicular strokes sometimes and be sure to fill in any spots that are light on glue. Lay the membrane into the glue while it’s still wet. Gently roll the EPDM membrane to the left over the glue. Be certain that the adhesive transfers to the underpart of the membrane. Keep up rolling it until you reach the left edge of the roof.
Step Nine
Press the membrane into place with a broom to remove any air. After the membrane has been laid into the glue, press a hefty duty 2 by 16 in vertical swipes over it. Work outward from the wrinkle to the rim of the roof. This will remove air and insure positive contact. Touch the adhesive with your finger to test its sogginess. Be sure that it’s tacky, but not sufficiently to string to a dry finger touch. However, roll the membrane out over all that you’ve placed so far, If the glue begins to dry. Afterward, continue applying the rest of the glue and rolling the remaining EPDM membrane over it. Stay 15 to 30 minutes for the glue to dry. This time can vary depending on moisture and temperature.
Step Ten
Attach the diverse side of the EPDM matrix. Flip the unattached side of EPDM onto the side stuck to the roof. Lay down the glue to the remaining bare side of the roof horizontally from the EPDM crease. Be sure you place satisfactorily adhesive that it’s opaque. Subsequently, gently roll the remaining half of the EPDM matrix over the glue and press down on it with a drive broom to take off air bubbles. Touch the adhesive with your finger before rounding the EPDM membrane over it. It should be sticky, but not enough to glue to your dry finger.
Tools Required For Installing A Roof Includes;
- Small spade
- Hammer
- Screwdriver
- Bolster
- Hammer
- Screwdriver and drill- screw
- Wallpaper scraper
- EPDM rubber
- Water-grounded deck adhesive
- Big surface adhesive roller
Since producing your flat roof is complicated, it’s always a good idea to reach out to a company that handles flat roofing with high efficacy.
Reach out to Royal Renovators Inc. at 118-35 Queens Blvd, Forest Hills, NY 11375 for professional roofing services and expert assistance. Call us today at 718-414-6067 to schedule your consultation or request a free estimate.
FAQs
What materials are commonly used to install a flat roof?
Common flat roofing materials include EPDM rubber, TPO, PVC, modified bitumen, and built-up roofing, depending on budget, climate, and building requirements.
What is the first step in installing a flat roof?
The first step is preparing the roof deck by cleaning debris, repairing damaged areas, and ensuring proper slope for water drainage.
Do flat roofs need a slope for proper installation?
Yes, flat roofs require a slight slope to prevent water pooling and ensure efficient drainage, which helps extend the roof’s lifespan.
Can I install a flat roof myself?
While small repairs may be possible, full flat roof installation is best handled by professionals to ensure correct layering, waterproofing, and long-term performance.
How long does it take to install a flat roof?
Flat roof installation typically takes a few days, depending on roof size, material choice, weather conditions, and site preparation.